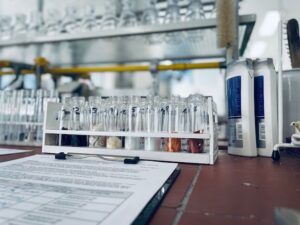
DIN EN 1811 describes a method for determining the release of nickel of metal parts. For coated metals, an abrasion process according to DIN EN ISO 12472 is carried out beforehand. This test is provided for all metal products that are either pierced through the skin (piercings) or otherwise have prolonged skin contact.
Among the heavy metals, there are certain elements that are very important for the properties. Nickel, for example, has very positive properties because it can make an iron alloy harder. Many highly stressed metal utensils are therefore coated with a nickel alloy (e.g. sewing needles).
Nickel is one of the best-known elements of allergy sufferers. It has strong skin sensitizing properties and many people have developed an allergy to it. During prolonged skin contact, especially when sweat or other liquids are involved, nickel can be slowly extracted from the alloy. This dissolved nickel can then cause humans to develop an allergy to nickel. This allergy can lead to severe impairments due to the prevalence of metal utensils (with nickel) and the very low sensitivity.
Since a complete renunciation of nickel would lead to greater problems in maintaining certain material properties, the test for nickel does not measure the total content, but the so-called release. This means that it is measured how much nickel per surface can be dissolved by sweat within a week (μg/cm2/week). For utility and coated objects (including metal coatings), it is customary to carry out a so-called abrasion procedure before the release test. The metal piece is permanently moved in a grainy, defined abrasion medium so that the medium stresses the surface. As a result, the surface can be artificially aged and a measurement is more in line with reality.
When measuring the nickel release, the metal sample is first prepared and then immersed in an artificial welding solution for one week. Subsequently, the concentration of nickel in the solution is measured using ICP-OES. The release can be determined after conversion to the surface of the metal part.
Even small scratches on the surface can greatly distort the result. In the case of damaged samples, the damaged area can be protected using sealing varnish (nickel-free).
At the beginning, we clarify the scope of testing, the goal of the tests and, if applicable, the project requirements with the customer.
We prepare a quotation based on the scope of testing and the requirements
The order is clear and as soon as the test sample is received in the laboratory, we get straight to work with the sample.
The results are available in the form of a test report. In addition to the pure test result, an overall assessment according to legal, general or customer-specific requirements is possible.
INDEPENDENT MATERIAL TESTING
We help, advise and test!
CTL® Bielefeld
Chemisch-Technologisches Laboratorium
Krackser Str. 12
33659 Bielefeld
Deutschland
Tel. +49 521 400 82 89 0
E-Mail sekretariat@ctl-mails.de